BEST SANTA FE 2 easel
Product Description:
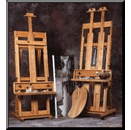
The BEST Sante Fe II is a handcrafted easel that has been designed to perfection. These easels are designed for the heaviest canvases and have an adjustable extension for increased stability. It is designed for canvases that weigh up to 300 pounds, and it has a higher weight capacity than the Santa Fe I. Artworks can be raised and lowered with ease using the marine style wench. Rubber grips and a double mast design prevents the canvas from moving around. The easel comes with two steel canisters and a melamine tray for extra utility. The BEST Sante Fe II is one of the top selling easels from BEST for its utility and appealing design.
Specs:
(Oversize Shipping: $227.95)
Specs:
- Canvas weight capacity of up to 300 pounds
- Maximum canvas height: 106"
- Lowest ceiling height setting: 78"
- Highest setting: 129"
- Width x depth of the base: 24" x 30"
- Easel ships partially assembled
(Oversize Shipping: $227.95)
Customer Reviews
Product Reviews
Sally T.Ryan
Ann Arbor, MI
July 16, 2012
I bought the Santa Fe 2 just 2 days ago. Much easier to assemble than I thought from looking at the poorly written and hard to read instructions [NO VIDEO ENCLOSED]. Had to figure out how to make the winch crank down, not just up. You have to jiggle the little metal latch over the teeth, lifting one end so the winch can crank up AND down.
Also the double mast top "painting trays" [meant to hold your painting at the top] slide down only about 4 inches. So, for example, if your painting was 42 inches high and set lower to the floor so you could paint near it's top, there would be no way to secure the top of it with the two small "painting trays." What I did was take the small painting SUPPORT, turned it upside down and slid it over the top, down to the top of my painting, tightened the black knob so it held the painting securely.
Despite these flaws, so far I love it. It is beautiful, sturdy, strong and flexible.
Daniel Wilder
Philadelphia
February 21, 2011
Pease note any modifications to your easel may void your warranty.
Even though I really enjoy my Santa Fe II easel, I am 6' tall and the tray attached to the winch does not travel high enough, so I can finish the bottom of a painting while standing up. To correct this minor glitch,
1) Remove the sliding frame (shaped like an upside down with four black cross-shaped nuts.
2) Make a sketch of how the rope goes through the pulleys, eye lags and attaches to the winch.
3) Remove the rope from the pulleys, single eye lag, and winch.
4) Remove the two eye lags with pulleys and the single eye lag from the center brace. (do not remove eye lag and pulley from sliding tray).
5) Stand the frame on end so it looks like a square shaped .
6) Drill three holes in the bottom of the cross brace (make sure the holes are not larger than the eye lags), one in the center, one from the left side, the same on the right side.
7) Attach one eye lag with pulley on the left side; attach one eye lag with pulley in the center, and a single eye lag on the right side.
8) To replace the rope you will need a new rope at least 6 feet longer than the original.
9). The tray with eye lag and pulley should be down at the base of the easel. Now replace the new rope following your sketch.
10) The tray should now travel at least 6 feet high.
Maryann N. M.
Pottstown, PA
July 02, 2006
JUST WANT YOU TO KNOW.... IN IT WAS A VIDEO SHOWING THE ENTIRE SET UP PROCEDURE... APPRECIATE YOUR RESPONSE... I LOOOVE MY REAL EASEL! ALL THE OTHER ONES FOR THE LAST 27 YEARS FELL OVER AT SOME POINT OF ADJUSTMENT AND BROKE. THANK YOU SO MUCH! TOP OF THE LINE ART EASEL! MARYANN
Copyright © 2002-2025 Madison Art Shop™ LLC. All Rights Reserved.


